|
D-ILA Bulb Swap
|
Changing out the bulb on your D-ILA projector is a simple task, especially now that there is an inexpensive-high-wattage direct replacement to the stock high-price JVC unit.
Cermax makes direct replacement Xenon bulbs that perform exactly like the stock bulb but cost 40% less - that is until JVC decides to lower their bulb costs. Warning - these bulbs, whether from JVC or Cermax should be handled with extreme care. They are charged with very high pressure Xenon gas and you will want take extra care when handling them. Also, these pictures and instructions are meant to be used as a guide along with the directions that are supplied with the bulb. It is a meant to help clarify any simplify an questions that may arise during the process. Another important tip for this process would be to use surgical gloves or silk gloves when handling the new bulb - this will help to prevent any hand oils from getting on the lens - (thanks to Tryg). Anyone with additional tips or ideas about this installation, please email me and I will add them.
Contact information for new bulb purchase:
rfelten@asltg.com - Ralph at Atlas Specialty Lighting. http://www.asltg.com - 813-238-6481 - Ralph's number.
|
|
|
|
|
|
|
1
|
 |
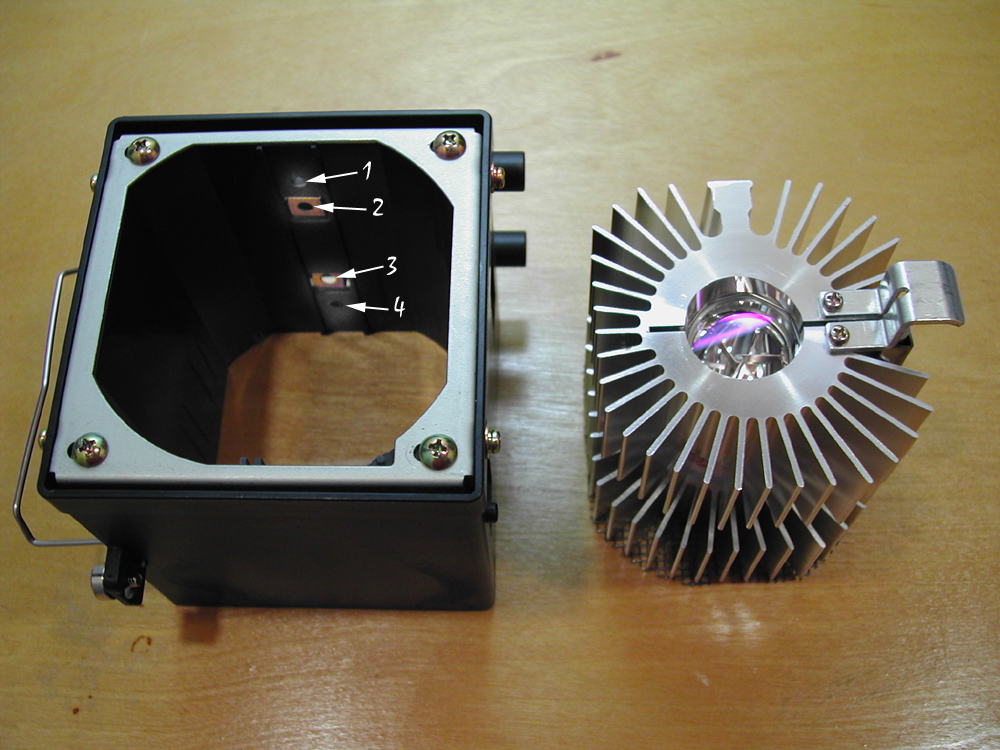
After removing the access panel on the bottom of your D-ILA projector, You will see your bulb sitting nicely inside the cavity.
1a). Remove the screws that hold the black bulb housing to the D-ILA projector. You can then grab the housing by the bail and then pull it gently straight out.
1b). Unscrew the four screws that hold the heat sink assembly to the bulb housing. These screw locations are shown in the blow-up image to the left, these screws hold the power connectors to the housing. Inspect that the two power connectors are clean and free from apparent arcing. |
|
|
|
| Heat sink (with encapsulated bulb) removed from housing. |
|
|
|
|
|
2
|
 |
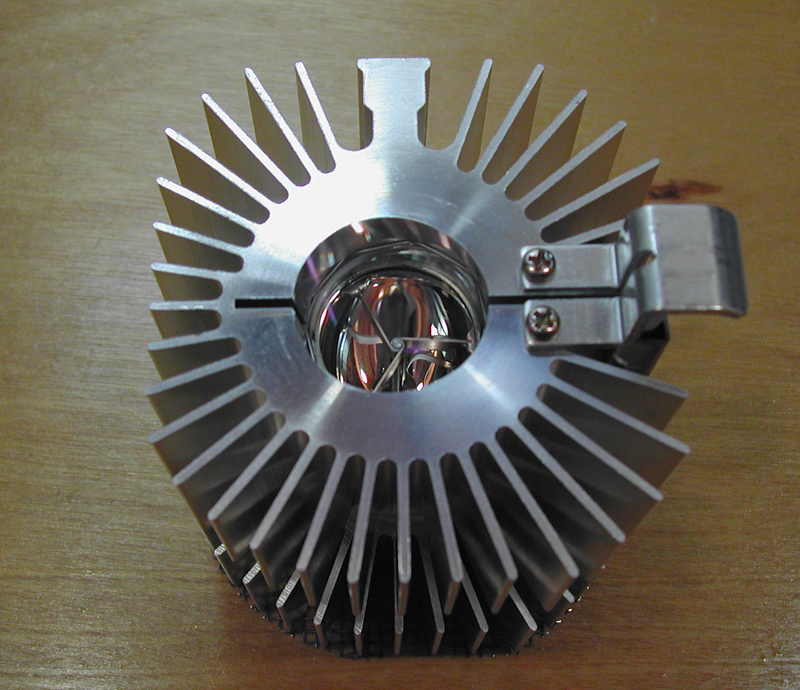
Now slowly pull out the heat sink assembly as shown to the left. It will slide out straight up when viewed in the same orientation as either pictures from step 1 or step 2. |
|
|
|
|
|
| Heat sinks with bulb now slid out of the bulb housing with electrical connections. |
|
|
|
3
|
 |
Remove the clips from the heat sinks (both upper and lower), there are four clips all together. These clips are all that hold the heat sinks to the bulb. The bulb is not screwed in, nor attached in any way - it is merely compressed top and bottom by the heat sinks. So, be careful to not pry or twist anything to hard. |
|
|
|
|
|
| Retainer clip removal - these clips hold the heat sinks to the bulb. |
|
|
|
|
|
|
|
|
|
|
|
|
|
|
|
|
|
4
|
 |
Remove the heat sinks from both the top and bottom of the original lamp. You may have to wedge a small screw driver into the opening to allow the heat sink to come off freely. Warning - these bulbs, whether from JVC or Cermax should be handled with extreme care. They are charged with very high pressure Xenon gas and you will want take extra care when handling them.
The following warning is from JVC literature.
"Used lamps should be returned to JVC, or JVC authorized distributors via authorized dealers, in the carton box provided.
Following the recommende method, JVC, or JVC authorized distributors, will reduce the high pressure inside the lamp before disposal.
If customers, or dealers, fail to return the lamp to JVC, or an authorized distributor, in the carton box provided, JVC, or JVC authorized distributors will not accept any liability or responsibility for any damage or injury incurred in the disposal of the lamp." (thanks to wm)
Inspect where the heat sink compound was placed on the lamp. Make sure to clean some of the old compound so that it doesn't fall onto the housing. Also, clean the heat sink fins of dust to allow for better cooling.
|
|
|
|
| Upper heat sink shown removed from bulb. Also remove lower heat sink. |
|
|
|
|
|
|
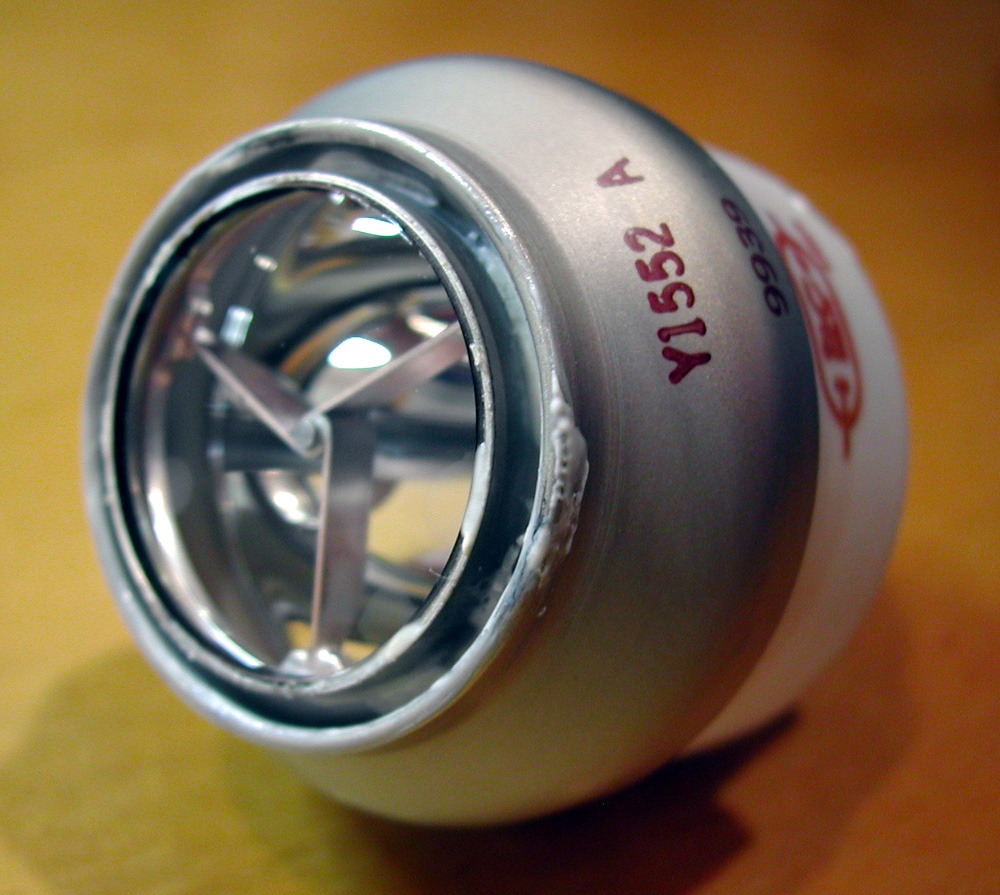
Be sure to note where the original thermal grease was applied - which is basically at all points of contact between the bulb housing and the heat sinks. Now with the new bulb available, apply a thin layer to both the upper and lower sections - located on the lower half of the bulb. I don't have a picture of this, but the rear portion of the bulb makes contact to the lower heat sink around the circumference of the bulb housing in two major areas - an upper and an indented lower area, both located on the lower half of the bulb. Again, note the location of the grease from your original bulb. This area will use most of the thermal grease provided.
Now apply a small amount to the front ring and rear ring of the lamp near the lens - be extra careful to not allow any to get onto the clear lens. If it does, wipe off with a clean towel and then wipe clean with some alcohol. |
|
|
5
|
 |
|
|
|
| Thermal grease applied to new bulb - examine old bulb for important areas to apply grease. |
|
|
|
|
|
|
|
5b
|
 |
 |
 |
|
|
|
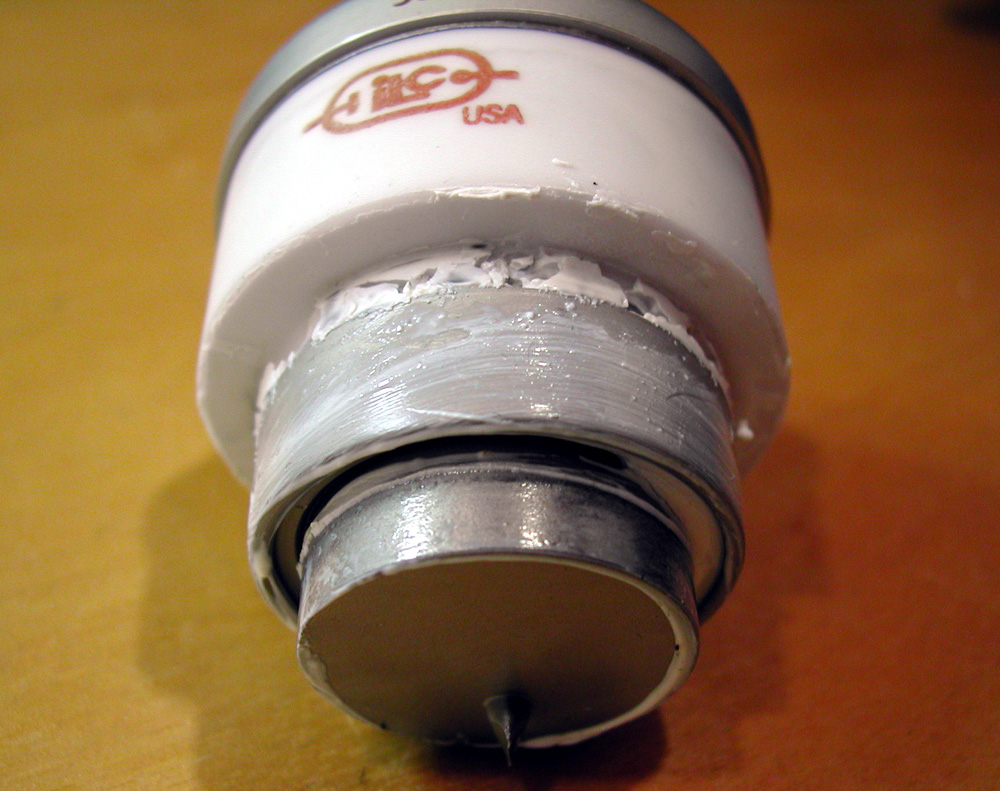
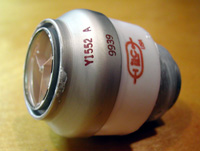
| Note: Apply grease to ring right around edge near lens. This is a shot from an original JVC lamp - I applied the grease more evening and was careful to avoid the bulb. |
|
Note: Also visible from this shot. |
|
Note: Apply evenly to both rear sections as shown - this shot is from an original JVC bulb, and although messy, it represents the locations to apply the thermal grease. |
|
|
|
|
|
|
|
|
|
|
|
|
|
|
|
|
|
|
6
|
|
 |
|
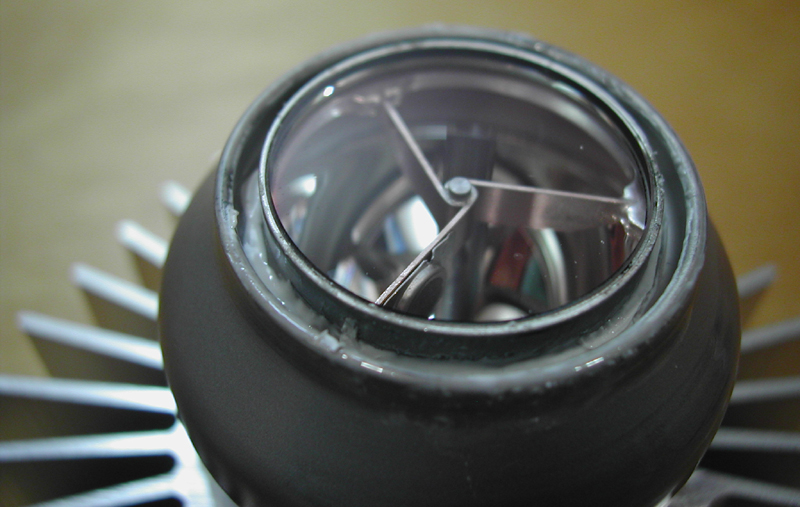
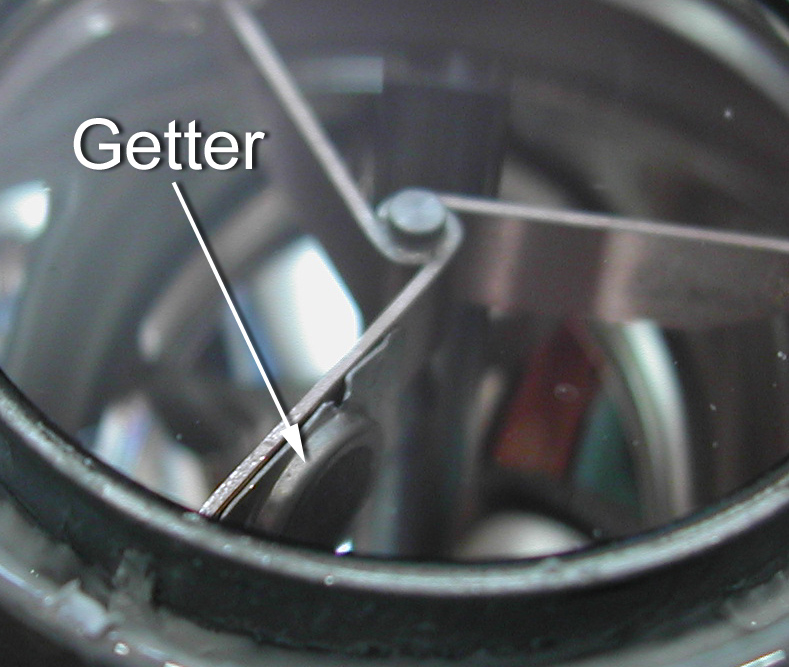
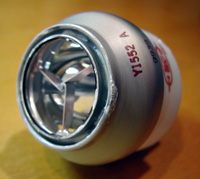
Looking into the bulbs lens, locate the getter (used to collect impurities while the bulb ages). It is a small circular object mounted on one of the spokes. This should face to your right - or away from the housings bail handle when the assembly has been reinserted into the black housing. For proper orientation, view images from steps 1, 2 & 4. They show the getter on the right pointing toward the clips. (Thanks to Mark Foster for this tip.)
You will know the orientation is correct if when reassembled, the getter points to the right (toward clips) with everything configured as the step 1 image.
Once you locate the getter an slide the bulb into the lower housing, be sure bulb is firmly seated all the way down. Next, carefully put the upper heat sink on the bulb and be very careful to not allow any of the thermal grease to get onto the lens surface.
The last step is to reverse steps 1 thru 3. Enjoy! |
|
|
|
|
|
Getter shown - place new bulb into housing so that getter faces to your right (with heat sink power connectors on top or facing away from you). |
|
|
|
|
|
|
|
|
|
|
|
|
|
|